
Netflix is a subscription-based streaming service that allows you to watch movies and TV shows from different countries around the world. Compared to Amazon Prime, Netflix is the most used streaming service across the world. With the help of a web browser, you can access or watch Netflix on any device. But, the company offers dedicated applications for various platforms like Android, iOS, Windows, Mac, Roku, Firestick, and many more. Cord cutters can also access Netflix on the Kodi app with the help of the Netflix Kodi addon. The simple and user-friendly add-on gives you instant and unrestricted access to all kinds of Netflix content. Watch the space below and know about the steps to install Netflix on Kodi.
Why do you need a VPN for Netflix?
You can only access the Netflix media that are available in your region. Due to specific reasons, Netflix media available in one area are restricted in other regions. To bypass the restrictions, you need a VPN on your device. Without a VPN, your connection with the Kodi app will be exposed to hackers, ISPs, viruses, malware, and surveillance. Hence, select and install a high-quality VPN on your device. We recommend you to use NordVPN for its speed and the ability to bypass the Netflix restrictions without exposing your original IP.
How to Install Netflix Kodi Addon
You can easily watch Netflix on Kodi with the help of the Netflix Kodi Addon. But, the Netflix addon is not available on the official Kodi repository. Hence, you need to access third-party sources to download Netflix Addon. To download addons from third-party sources, you need to enable unknown sources on Kodi.
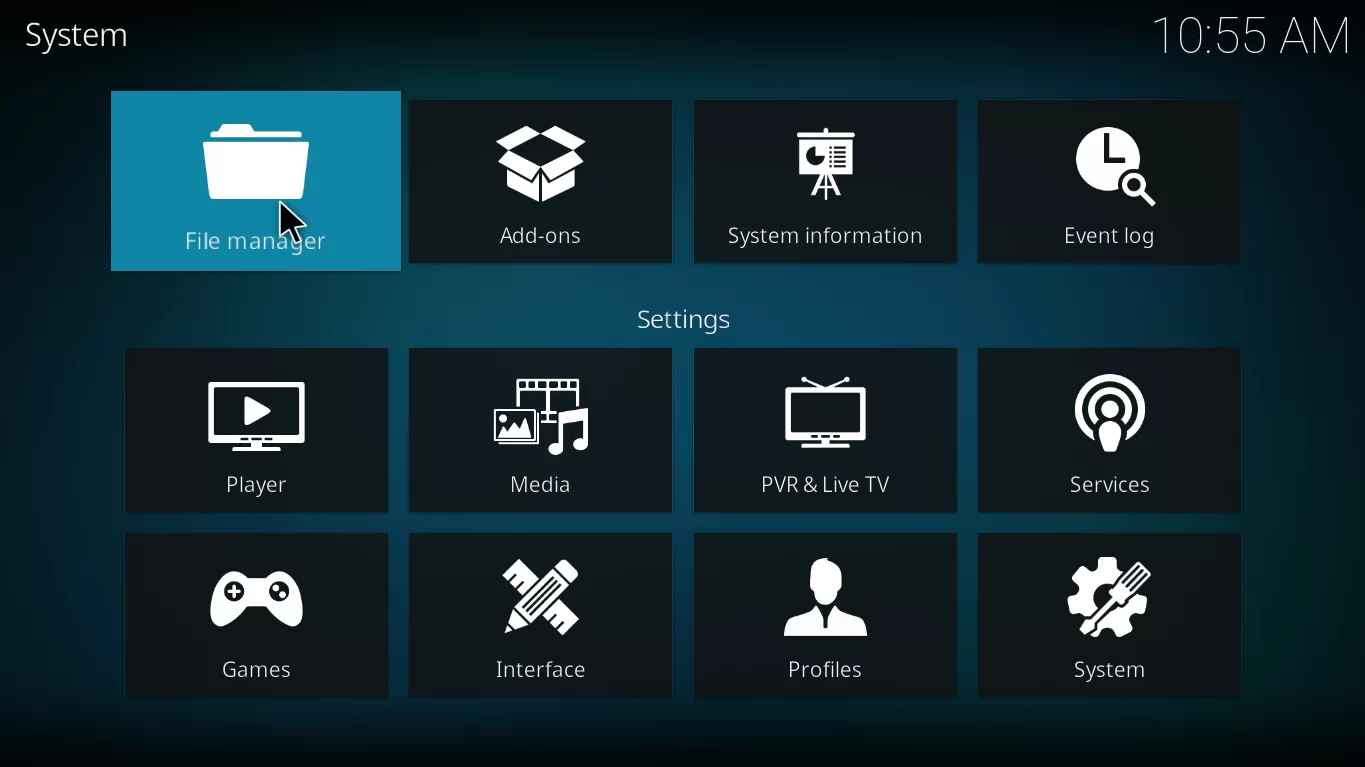
1. After enabling Unknown Sources, go to Kodi Settings and click the option File Manager.
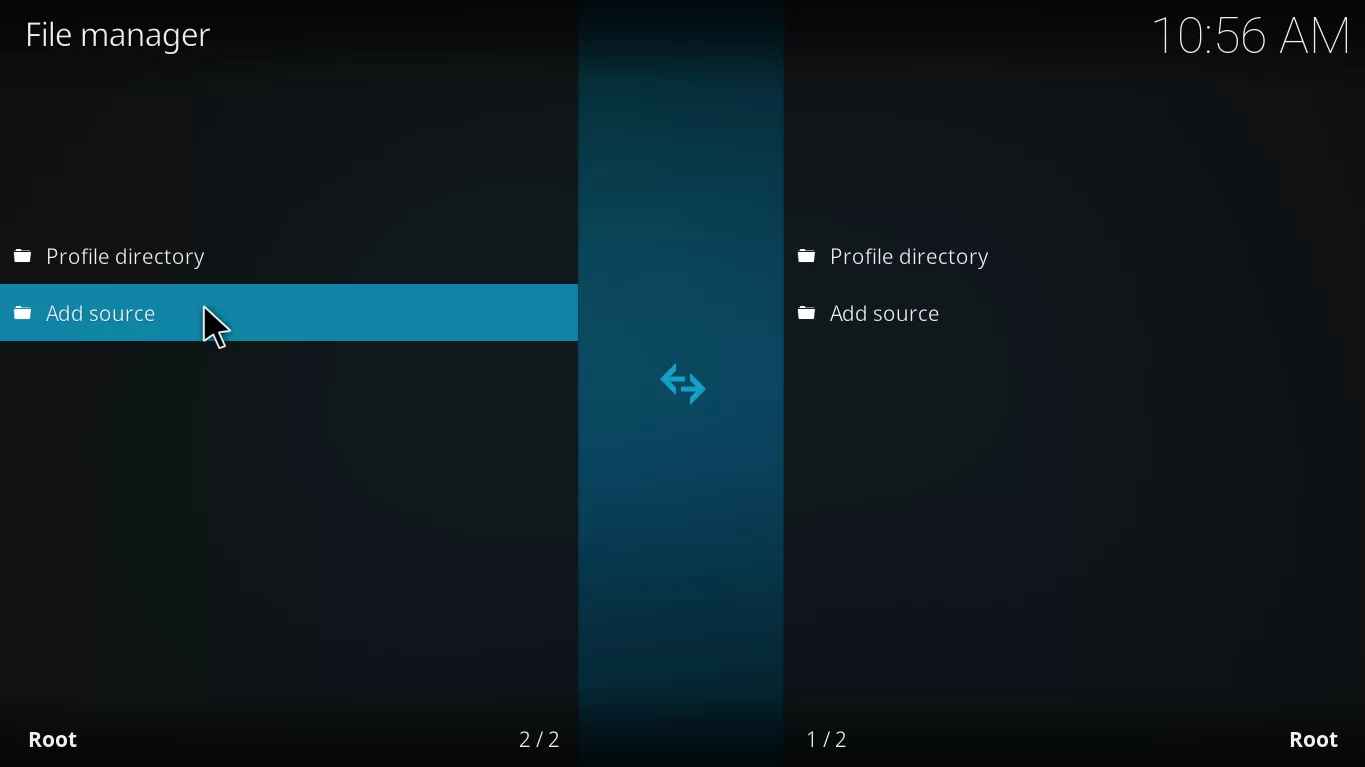
2. Double-click the Add Source button and select <None> on the pop-up.
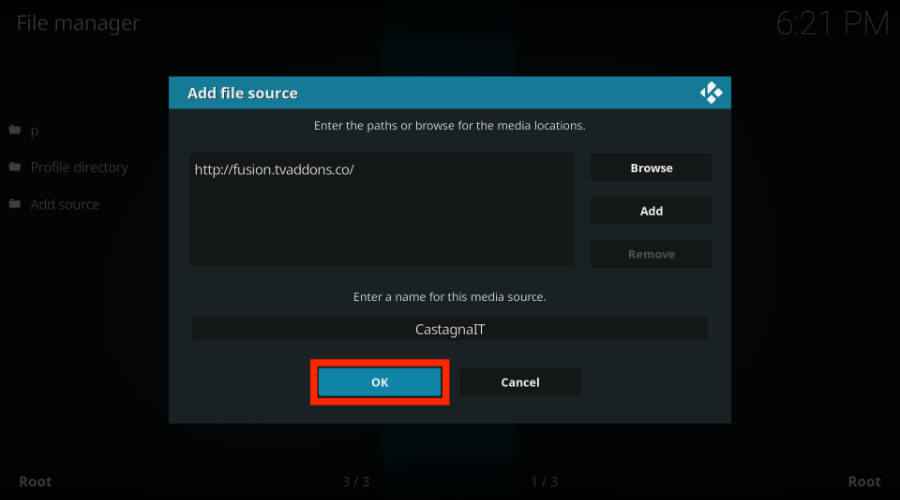
3. Now, enter the URL: http://fusion.tvaddons.co/ and type CastagnaIT on the name box.
4. Finally, tap the OK button.
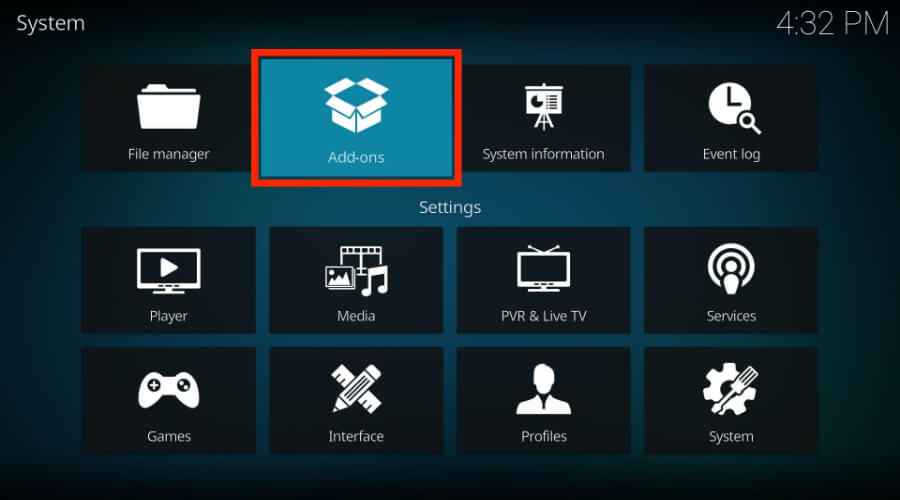
5. Go to the Kodi home screen and click the Settings icon located at the top.
6. Click the Add-ons menu from the list.
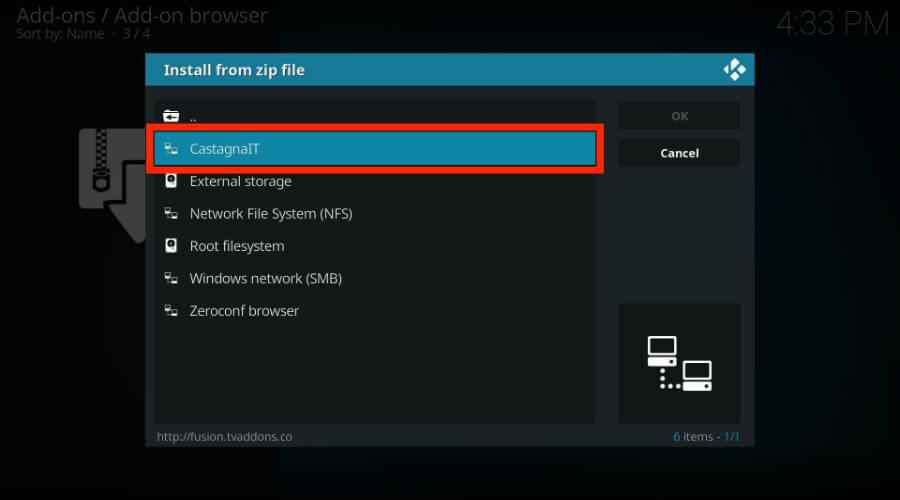
7. Scroll down and select the option Install from Zip file.

8. Look for the option CastagnaIT and click it.
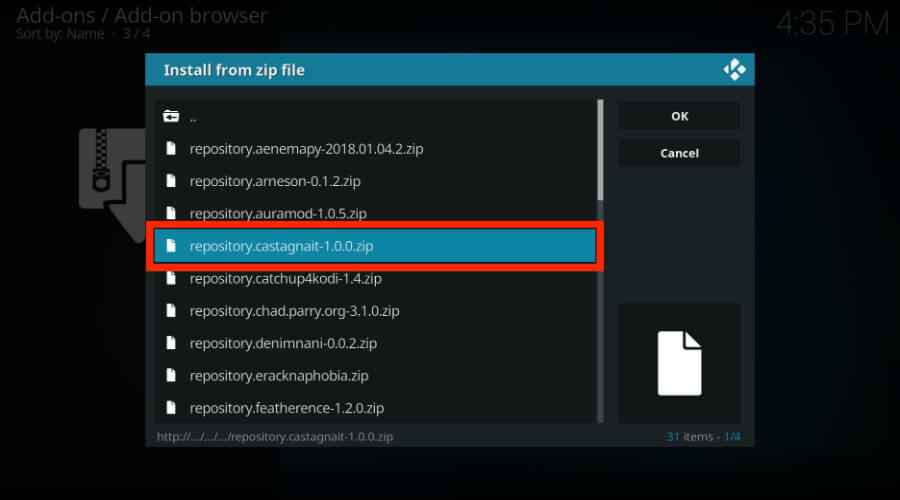
9. Then, select Kodi-repos and tap the option english.
10. Finally, select the Zip file repository.castagnait-1.0.0.zip.
11. Wait for the CastagnaIT Repository to install on Kodi.
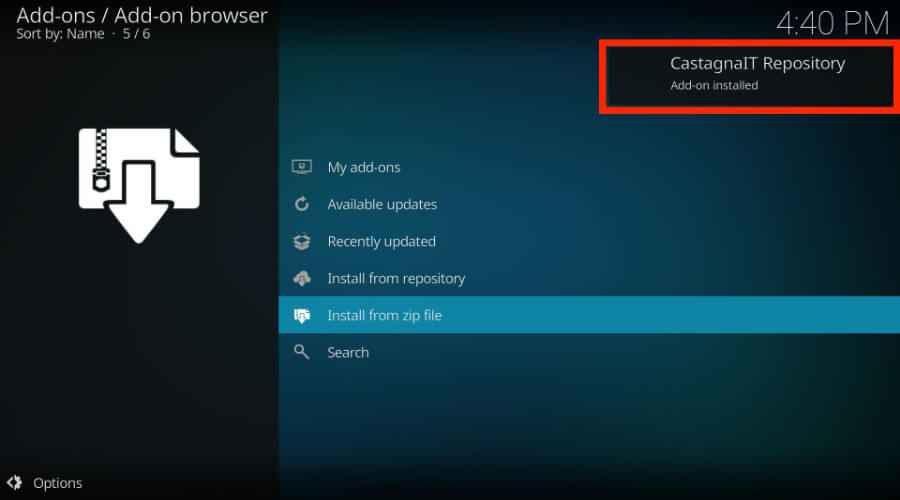
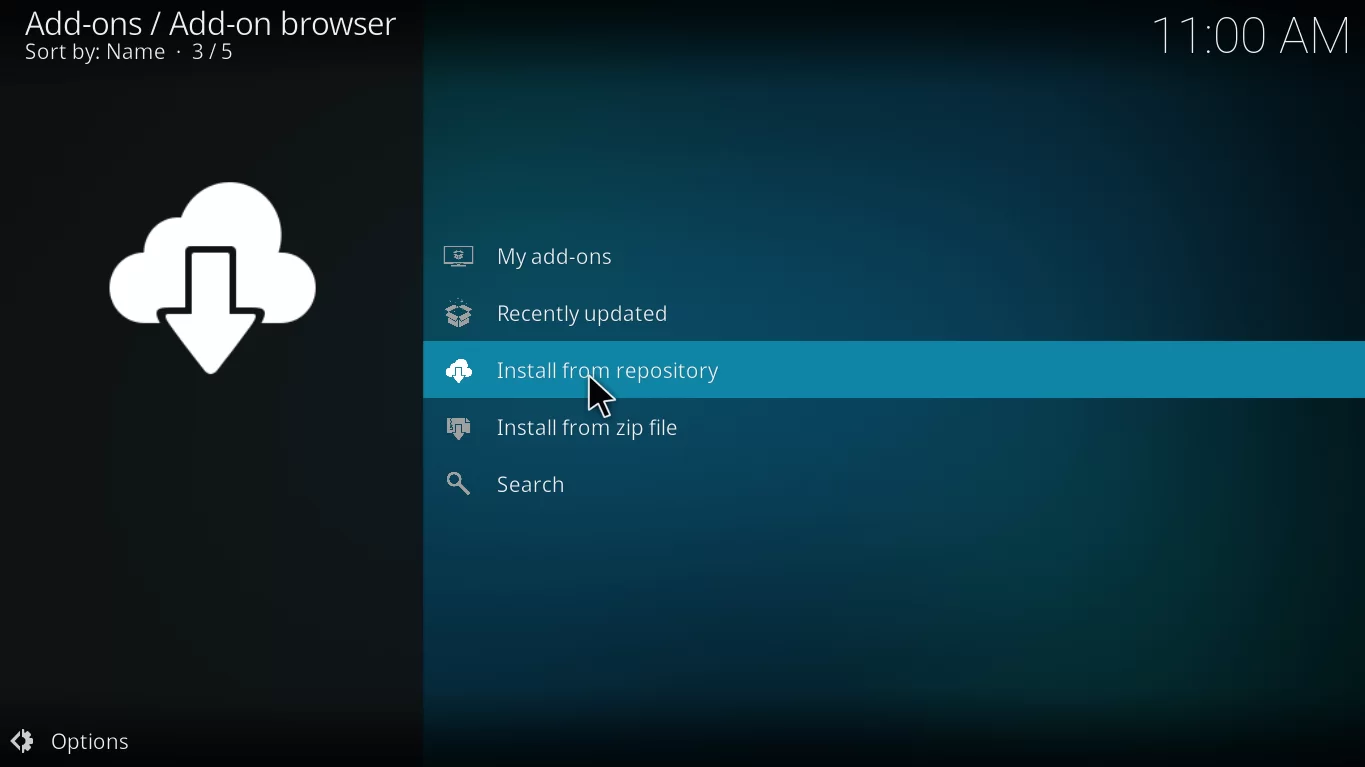
12. After installing the repository, Go to the Add-ons page and select Install from repository.
13. Locate and tap the option CastagnaIT Repository.
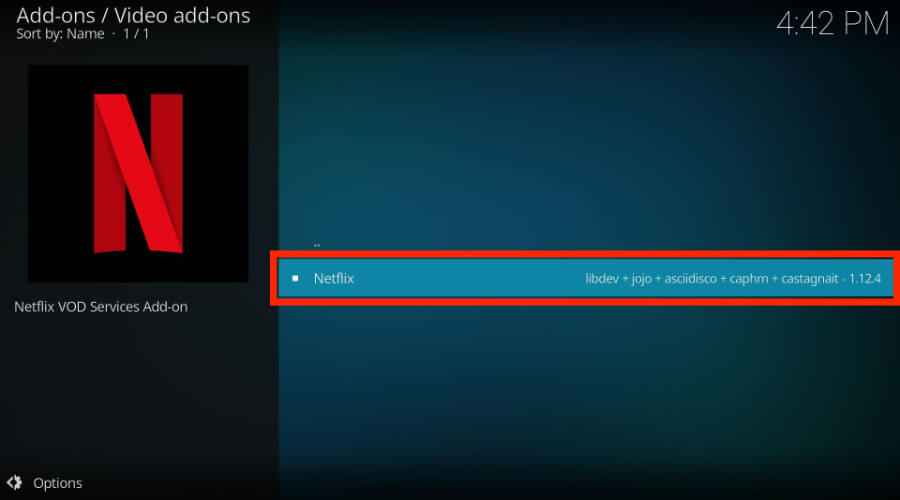
14. Select Video add-ons and hit the option Netflix.
15. On the Netflix info page, tap the Install button to download the addon.
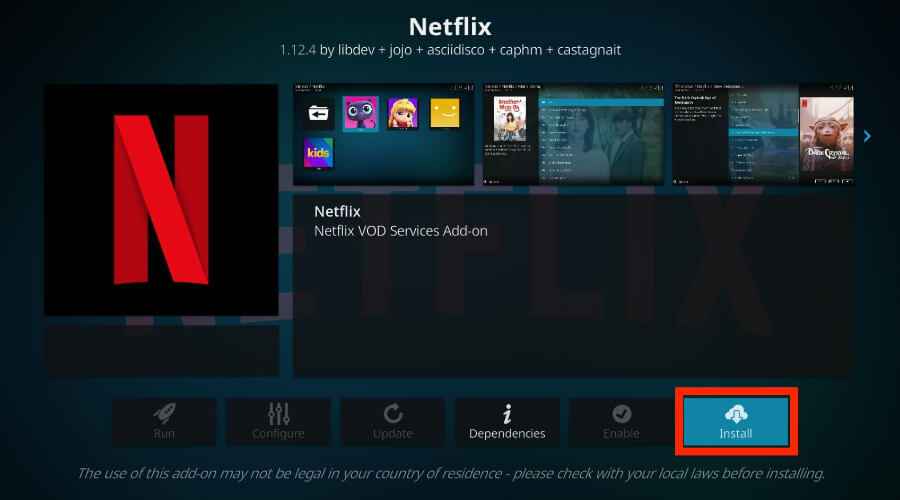
16. Select a version to install and click OK.
17. Now, the Netflix addon will be installed on Kodi.
How to Setup and Watch Netflix on Kodi
After installing the Netflix addon, you need to configure your Netflix login credentials to watch Netflix movies and TV shows. Hence, before downloading this addon, create a Netflix user account with the convenient subscription package. Without a subscription, you can’t stream anything on Netflix.
1. Launch the Netflix addon and click the option E-mail/Password.
2. Enter the Email ID and click OK.

3. Then, enter your Netflix Password and click OK.

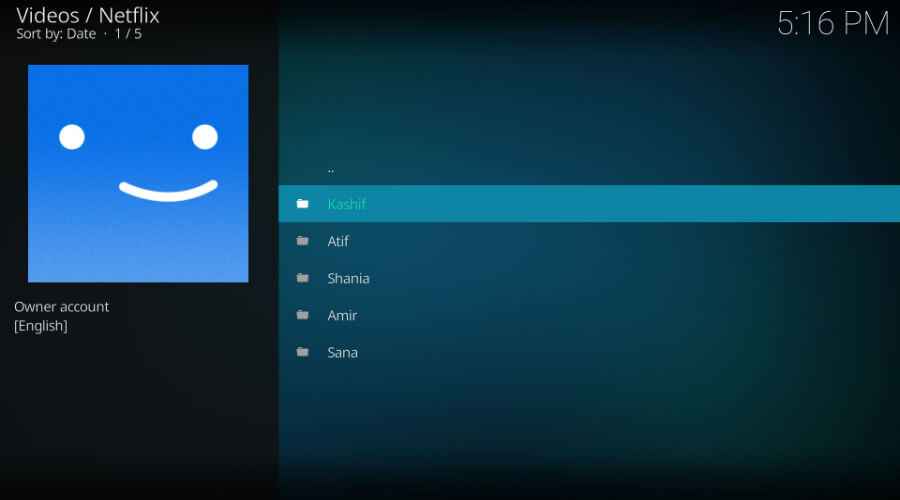
4. Now, select your profile name and stream Netflix movies on Kodi.
The above-listed is the only working method to install Netflix addon on Kodi 18.3 Leia and other versions. Install Netflix and stream all your favorite Netflix originals, movies, and shows on your device.
Frequently Asked Questions
With the help of the CastagnaIT Repository, you can easily install the Netflix Kodi addon.
No. Netflix is a premium subscription service that does not offers its content for free.